What Is a Spray Foam Insulation Kit?
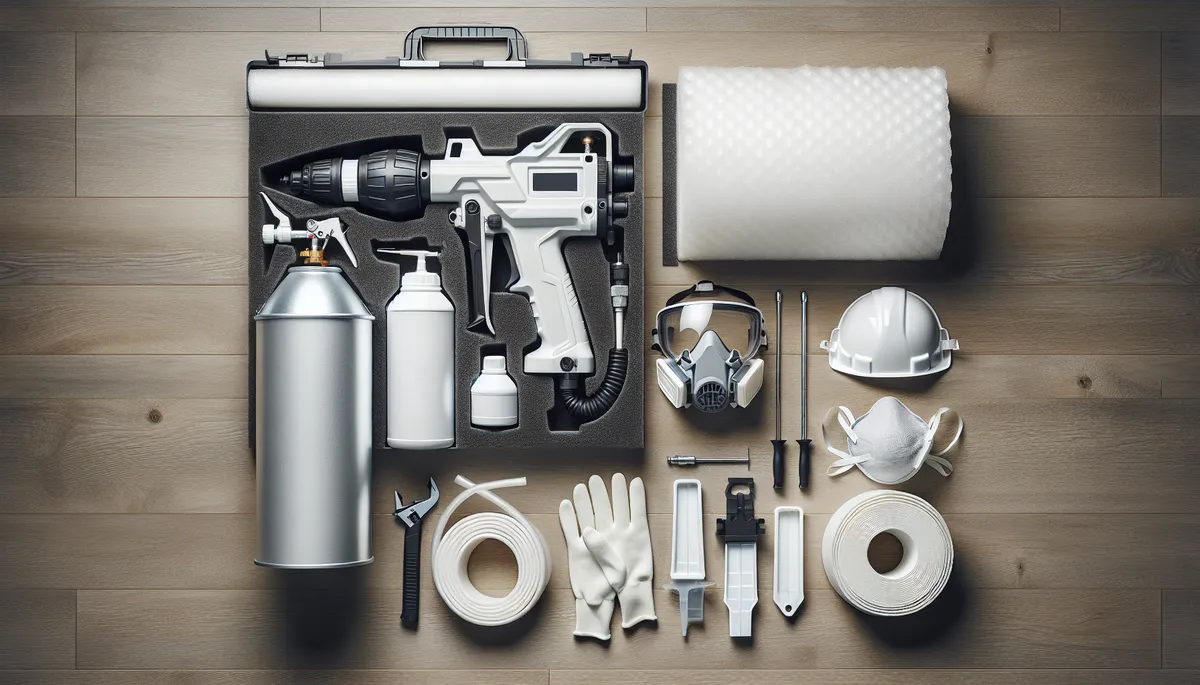
A spray foam insulation kit is a self-contained system that lets you apply spray polyurethane foam without hiring a professional crew. Each kit typically includes two pressurized cylinders – one containing the A-side (isocyanate) and one containing the B-side (polyol resin) – along with a dispensing gun, hoses, and multiple nozzles.
These kits are designed for contractors handling small jobs, serious DIYers tackling home improvement projects, and property managers addressing spot insulation needs. Whether you are sealing rim joists in a basement, insulating a small attic space, or filling gaps around windows and doors, a spray foam insulation kit puts professional-grade insulation capability in your hands.
The appeal is straightforward: you skip the scheduling delays and mobilization costs of a professional spray foam rig, and you get the same high-performance insulation in a portable, ready-to-use package. But these kits are not a replacement for professional installation on every project – and knowing where that line falls is what separates a successful DIY job from an expensive mistake.
Open-Cell vs Closed-Cell Spray Foam Kits
Before you buy a spray foam kit, you need to understand the two main types of spray foam available. For a deeper dive, read our full guide on open cell vs closed cell spray foam.
Open-Cell Spray Foam Kits
Open-cell foam (also called half-pound foam) expands dramatically – up to 100 times its liquid volume. It cures into a soft, spongy material with an R-value of roughly R-3.5 to R-3.7 per inch. Open-cell kits are ideal for interior walls, soundproofing applications, and areas where moisture permeability is acceptable or even desired. They are also more affordable per board foot, making them a popular choice for DIY spray foam insulation projects on a budget.
Closed-Cell Spray Foam Kits
Closed-cell foam (two-pound foam) is denser, harder, and delivers R-6.0 to R-7.0 per inch. It also acts as a vapor barrier and adds structural rigidity to walls. Closed-cell kits cost more per board foot, but you need less thickness to hit the same R-value. These kits are the go-to choice for rim joists, crawl spaces, exterior walls, and any application where moisture resistance matters.
Which Type Should You Choose?
For most DIY kit applications – rim joists, band joists, small cavities, and gap sealing – closed-cell foam is the better option. Its higher R-value per inch means you achieve code-compliant insulation in tighter spaces, and the moisture barrier properties protect against condensation in critical areas. Open-cell kits make more sense for larger interior wall cavities where you have room for thicker application and want to save on material cost.
Spray Foam Kit Sizes and Coverage
Spray foam kits are measured in board feet. One board foot equals one square foot of coverage at one inch thick. Here are the standard kit sizes you will find from most manufacturers:
200 Board-Foot Kits
The smallest option, a 200 board-foot foam insulation kit covers roughly 200 square feet at 1 inch thick, or 100 square feet at 2 inches thick. These are perfect for small, targeted jobs – sealing rim joists in a single basement section, insulating around a few windows, or patching gaps in existing insulation. Expect to pay $300 to $450 per kit.
600 Board-Foot Kits
The mid-range spray foam kit is the most popular for DIY projects. A 600 board-foot kit covers approximately 600 square feet at 1 inch thick. This is enough to insulate the rim joists in a typical basement, handle a small attic knee wall, or insulate a workshop or shed. Pricing ranges from $650 to $900.
1,200 Board-Foot Kits
The largest commonly available kit size, 1,200 board-foot kits are suited for bigger residential projects – a full attic floor, a large crawl space, or an addition. These kits typically run $1,100 to $1,600. At this scale, you are approaching the threshold where professional installation starts to make financial sense, depending on your local market.
Cost Comparison: DIY Kits vs Professional Installation
Understanding spray foam insulation cost is critical to making the right decision for your project.
DIY Spray Foam Kit Costs
When you shop for a spray foam insulation kit – whether at Home Depot, a building supply store, or online – expect to pay between $1.50 and $2.50 per board foot for closed-cell kits, and $1.00 to $1.75 per board foot for open-cell. This includes the chemicals, gun, hoses, and nozzles. You will also need to budget $50 to $100 for PPE (respirator, Tyvek suit, gloves, goggles) if you do not already own them.
A typical DIY project using a 600 board-foot closed-cell kit might break down like this:
– Kit cost: $750
– PPE and supplies: $75
– Total: approximately $825 for 600 board feet
Professional Installation Costs
Professional spray foam contractors typically charge $1.50 to $3.50 per board foot for closed-cell and $0.75 to $1.50 per board foot for open-cell, but they also have minimum job charges – often $1,500 to $2,500 – that make small jobs disproportionately expensive. A 600 board-foot professional job might cost $1,500 to $2,100.
The Bottom Line
For small to mid-size projects under 1,200 board feet, DIY kits can save you 30% to 50% compared to hiring a contractor. But once you exceed that range, the per-board-foot economics shift. Professional rigs process material faster and at a lower per-unit cost, and for large-scale commercial or industrial projects, purchasing spray foam insulation in bulk 55-gallon drums is significantly more cost-effective than buying dozens of kits.
Step-by-Step DIY Spray Foam Application Guide
Follow these steps to get professional results from your spray foam kit.
Step 1: Prepare the Work Area
Clear the space completely. Remove any stored items, cover surfaces you do not want foam on with plastic sheeting, and mask off windows, electrical boxes, and any fixtures. Spray foam bonds aggressively to almost everything, and cured foam is extremely difficult to remove.
Step 2: Check Temperature Requirements
Both the chemical cylinders and the substrate (the surface you are spraying) need to be within the manufacturer’s specified temperature range – typically 60 to 90 degrees Fahrenheit. Cold chemicals will not mix properly, leading to poor expansion, off-ratio foam, and adhesion failures. Store your kit indoors at room temperature for at least 24 hours before use.
Step 3: Set Up Ventilation
Ensure adequate airflow in the work area. Open windows and doors, and set up fans to create cross-ventilation. The chemicals release vapors during application that require respiratory protection and fresh air exchange.
Step 4: Suit Up with PPE
Put on your full-face respirator with organic vapor cartridges, disposable Tyvek coveralls, chemical-resistant gloves, and safety goggles. Do not skip any of these items – the A-side chemical (isocyanate) is a sensitizer that can cause permanent respiratory issues with repeated exposure.
Step 5: Assemble the Kit
Connect the hoses to both cylinders, attach the dispensing gun, and install a nozzle. Open both cylinder valves fully. Test-spray onto a piece of cardboard to verify proper mixing – the foam should expand evenly and cure to a uniform color within 60 seconds.
Step 6: Apply the Foam
Hold the gun 12 to 24 inches from the surface. Apply in thin passes of no more than 1 inch per pass for closed-cell foam or 2 to 3 inches for open-cell. Allow each pass to rise and begin curing before applying the next layer. Work in a consistent pattern, slightly overlapping each pass.
Step 7: Allow Full Cure Time
Spray foam becomes tack-free within 30 to 60 seconds, but full cure takes 24 hours. Do not disturb, trim, or cover the foam until it has fully cured. Keep the area ventilated during the entire curing process.
Step 8: Trim and Finish
Once cured, trim any excess foam with a serrated knife or saw to create flush surfaces. Spray foam exposed to UV light will yellow and degrade over time, so cover it with drywall, sheathing, or an intumescent coating as required by local building codes.
Safety Requirements for DIY Spray Foam
Safety is not optional with spray foam chemicals. Here is what you need:
– Full-face respirator with organic vapor/P100 combination cartridges (not a dust mask)
– Disposable coveralls (Tyvek or equivalent) with hood
– Chemical-resistant gloves (nitrile, minimum 8-mil thickness)
– Safety goggles (sealed, not safety glasses)
– Adequate ventilation – mechanical ventilation if natural airflow is insufficient
– No other occupants in the building during spraying and for at least 24 hours after application
Isocyanate exposure can cause asthma-like symptoms, skin sensitization, and eye irritation. Once sensitized, even trace exposures can trigger reactions. Take the PPE requirements seriously – your long-term health depends on it.
Common DIY Spray Foam Mistakes to Avoid
After years of working with contractors and DIYers in the spray foam industry, we see the same mistakes repeatedly. Avoid these pitfalls:
1. Applying Too Thick in a Single Pass – Closed-cell foam generates significant heat as it cures (exothermic reaction). Applying more than 2 inches in a single pass can cause the foam to scorch, shrink, or even ignite in extreme cases. Stick to 1-inch passes and let each layer cure.
2. Spraying in Cold Conditions – If the chemicals or the substrate are too cold, the foam will not expand or adhere properly. You will end up with brittle, crumbly insulation that falls off the surface. Always check and maintain temperature requirements.
3. Skipping the Test Spray – A quick test on cardboard tells you immediately if the chemicals are mixing at the correct ratio. Off-ratio foam looks discolored, feels sticky or crunchy, and performs poorly as insulation.
4. Running Out of Nozzles – Spray foam cures inside the nozzle within 30 seconds of stopping. If you pause for more than 30 seconds, you need a fresh nozzle. Kits come with a limited number – plan your work in continuous sections to conserve nozzles.
5. Ignoring Fire Code Requirements – Spray foam is combustible and must be covered with a thermal barrier (typically 1/2-inch drywall) in occupied spaces per most building codes. Leaving exposed foam in a basement or attic ceiling can create a fire hazard and code violation.
6. Underestimating Coverage Needs – Calculate your actual board footage carefully before ordering. Running out mid-project means buying another kit, and partially sprayed areas are difficult to match up later. Add 10% to 15% overage to your calculations.
When to DIY vs When to Hire a Professional
A spray foam kit makes sense when:
– The project is under 1,200 board feet
– You are comfortable with detailed safety protocols
– The application area is accessible and straightforward (rim joists, small cavities, gaps)
– You are supplementing existing insulation rather than insulating an entire structure
– Budget is a primary concern and you have the time to do it yourself
Hire a professional when:
– The project exceeds 1,200 board feet
– You are insulating an entire home, attic, or crawl space
– The work involves complex geometry, cathedral ceilings, or hard-to-reach areas
– Local codes require inspection or certification of the insulation installation
– You need a full building envelope solution rather than spot treatment
For large commercial and industrial insulation projects, working with a spray foam supplier who provides bulk materials is far more practical and cost-effective than purchasing retail kits. Professional contractors using 55-gallon drum sets can process thousands of board feet per day at a fraction of the per-unit cost of disposable kits.
Where R-Value Associates Fits
At R-Value Associates, we supply spray foam insulation to professional contractors and large-scale projects across the country. While DIY spray foam kits serve an important role for small residential jobs, our focus is on providing bulk spray foam in 55-gallon drum sets for commercial, industrial, and large residential projects where energy efficiency and cost-effectiveness are paramount.
If your project scope goes beyond what a spray foam kit can handle – or if you are a contractor looking for reliable, competitively priced spray foam chemicals in bulk – we are here to help. Our team can advise on the right product for your application, provide technical support, and deliver materials directly to your job site.
Ready to scale up from kits to professional-grade materials? Contact R-Value Associates today to discuss your project needs and get a quote on bulk spray foam insulation.
Frequently Asked Questions
How many square feet does a spray foam insulation kit cover?
Coverage depends on kit size and application thickness. A 200 board-foot kit covers 200 square feet at 1 inch thick or 100 square feet at 2 inches thick. A 600 board-foot kit covers 600 square feet at 1 inch thick, and a 1,200 board-foot kit covers 1,200 square feet at 1 inch thick. Always calculate your actual square footage and desired thickness before purchasing.
Is DIY spray foam insulation as effective as professional installation?
When applied correctly and at the proper thickness, DIY spray foam performs identically to professionally installed foam – it is the same chemistry. The difference lies in application skill, equipment efficiency, and the ability to handle large volumes. For small, straightforward projects, a careful DIYer can achieve excellent results. For complex or large-scale jobs, professional equipment and experience deliver more consistent outcomes.
Can I buy spray foam insulation kits at Home Depot?
Yes, spray foam insulation kits from brands like Touch ‘n Seal, FROTH-PAK, and Tiger Foam are available at Home Depot, Lowe’s, and other home improvement retailers. You can also order kits directly from manufacturers online. For projects requiring more than a few kits, consider contacting a bulk supplier like R-Value Associates for better per-unit pricing.
How long does a spray foam insulation kit last once opened?
Once you start using a spray foam kit, you should aim to use all the material within 30 days. The chemicals begin to degrade once the valves are opened, and shelf life varies by manufacturer. Unopened kits typically have a shelf life of 6 to 12 months from the manufacture date. Always check the expiration date before purchasing or using a kit.
Do I need a permit to install spray foam insulation myself?
Permit requirements vary by jurisdiction. Some areas require a building permit for any insulation work, while others only require permits for projects that involve structural changes or exceed a certain square footage. Most jurisdictions also require spray foam to be covered with a 15-minute thermal barrier in occupied spaces. Check with your local building department before starting your project to ensure compliance with all applicable codes.