Proper roof underlayment installation is critical for protecting your home from water intrusion and extending the lifespan of your roofing system. Whether you’re a professional contractor or an experienced DIYer, this comprehensive guide covers everything you need to know about installing roof underlayment correctly.
Tools and Materials Needed
Before starting your underlayment installation, gather these essential tools and materials:
- Chalk line – For maintaining straight courses across the roof deck
- Cap nails or staples – Fasteners specifically designed for underlayment (1-inch cap nails recommended for synthetic, staples acceptable for felt)
- Hammer tacker or pneumatic stapler – For efficient fastening
- Utility knife with hook blades – For cutting underlayment to size
- Straight edge or T-square – For accurate cuts
- Underlayment tape – For sealing seams and penetrations
- Underlayment rolls – Choose between synthetic roofing underlayment, felt, or self-adhering products
- Measuring tape – For precise measurements and overlap calculations
- Safety equipment – Harness, rope, anchors, non-slip footwear, and gloves
Deck Preparation
Proper deck preparation ensures optimal underlayment performance and prevents premature failure. Follow these critical preparation steps:
Inspect for Structural Damage
Walk the entire roof deck and check for:
- Cracked, warped, or delaminated plywood or OSB sheathing
- Soft spots indicating water damage or rot
- Gaps between deck boards exceeding 1/4 inch
- Sagging areas that may indicate rafter or truss problems
Replace any damaged decking before proceeding with underlayment installation. A compromised deck will lead to underlayment failure regardless of installation quality.
Address Nail Pops and Fasteners
Protruding nails will puncture underlayment and create leak points. Drive down or remove any proud fasteners, and ensure all deck fasteners are flush with or slightly below the surface. Add additional fasteners if deck panels show movement or flex.
Check Moisture Levels
The deck should be dry before installation. Use a moisture meter to verify wood moisture content is below 19%. Installing underlayment over wet decking can trap moisture and lead to rot, mold, and deck deterioration.
Clean the Surface
Remove all debris, sawdust, nails, and old roofing materials. Sweep the deck thoroughly – even small debris can create puncture points or bumps that compromise the underlayment seal.
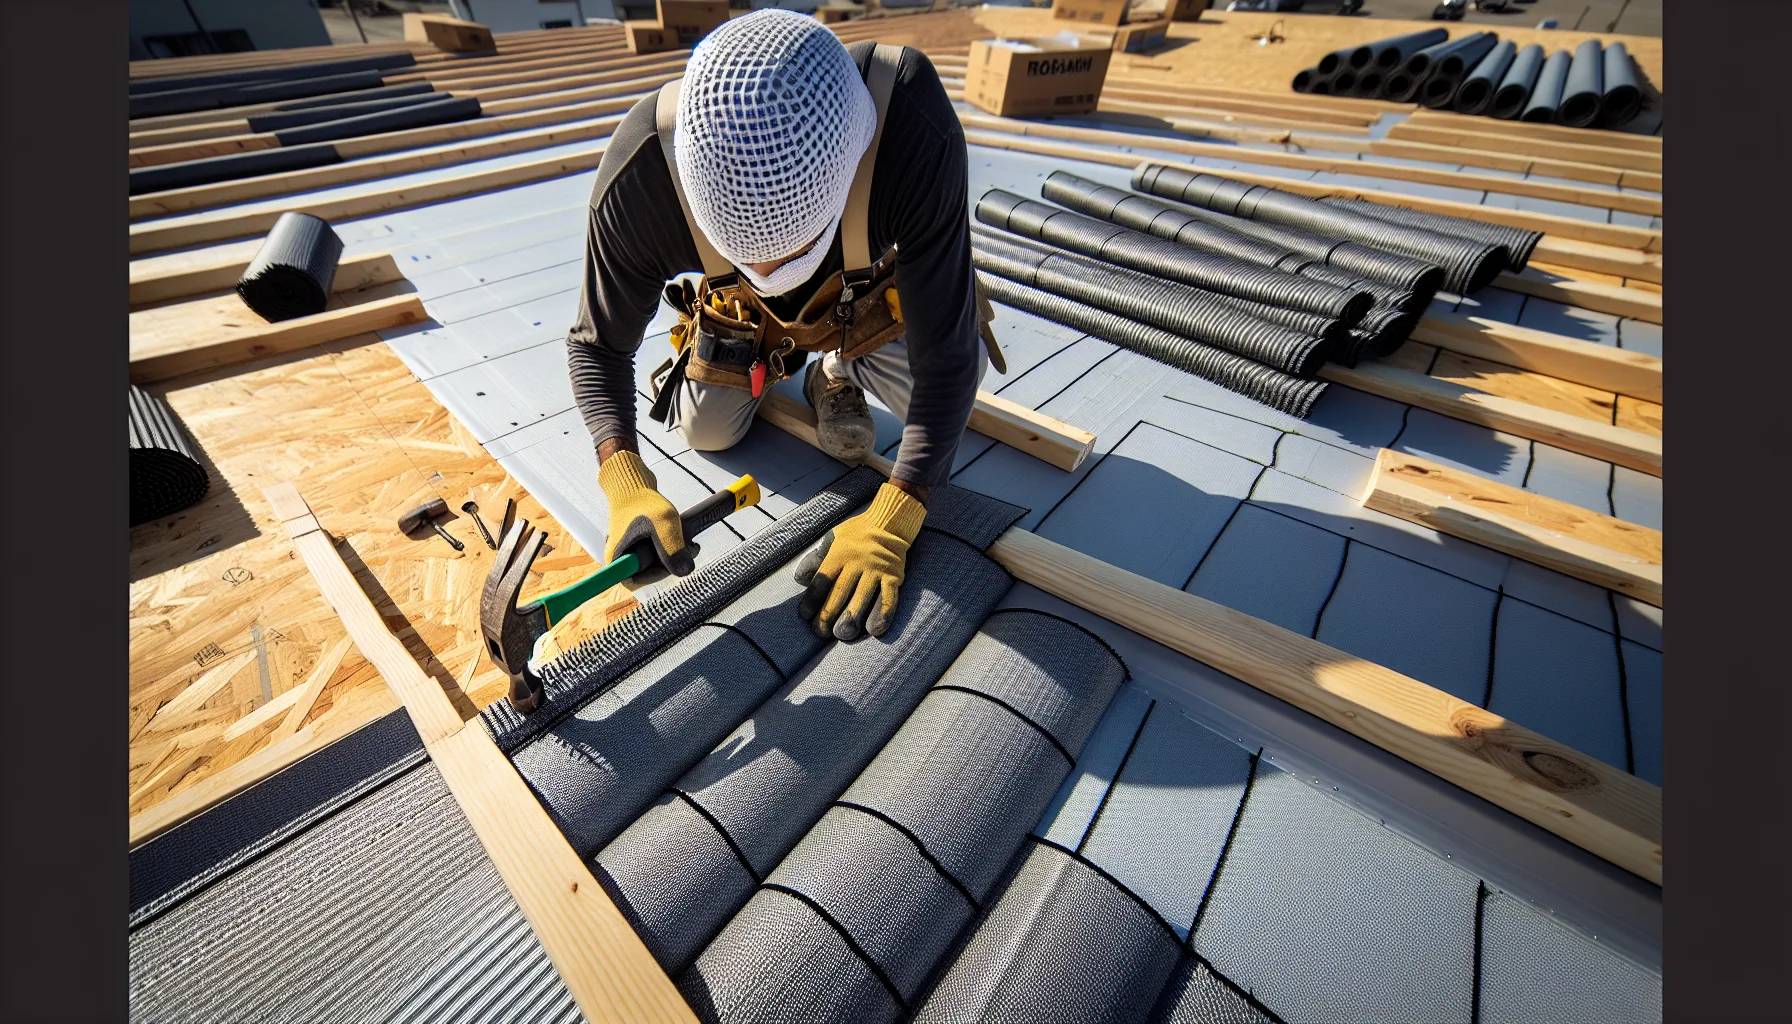
Step-by-Step Installation Process
Start at the Eave and Drip Edge
Begin installation at the lowest point of the roof – typically the eave. If you’re using peel and stick roofing underlayment or ice and water shield at the eaves (discussed later), install that first before synthetic or felt underlayment.
For standard underlayment, start your first course along the eave edge. The drip edge should already be installed along the eave before underlayment application (note: rake drip edges are installed after underlayment).
First Course Placement and Overhang
Position the first course to overhang the drip edge by 1/4 to 3/4 inch. This small overhang allows water to drip into the gutter system without wicking back under the shingles or running behind the drip edge.
Ensure the course runs perfectly straight along the eave. An angled first course will compound alignment issues throughout the entire installation. Use a chalk line snapped parallel to the eave as a guide if needed.
Horizontal Overlap Requirements
Horizontal overlaps (where one course overlaps the course below) vary by underlayment type:
- Synthetic underlayment – Minimum 4 inches (some manufacturers specify 6 inches; check product guidelines)
- Self-adhering underlayment – Minimum 2 inches (the adhesive creates a watertight seal with less overlap needed)
- Felt underlayment – Minimum 2 inches for 15-lb felt, 4 inches for slopes below 4:12
Most synthetic underlayment products have printed overlap lines to eliminate guesswork. Align the bottom edge of your next course with the marked line on the previous course.
Always install underlayment in a shingle fashion – working from bottom to top so each course overlaps the one below it. This ensures water flows over the seams rather than under them.
Vertical End-Lap Overlap
When you reach the end of a roll and need to start a new one on the same course, overlap the ends by a minimum of 6 inches. On low-slope roofs (below 4:12), increase vertical overlaps to 12 inches for added protection.
Stagger end laps between courses by at least 6 feet. Aligning vertical seams creates potential leak paths, especially in heavy rain or wind-driven precipitation.
Fastening Patterns
Proper fastening prevents wind uplift and keeps underlayment flat against the deck. Different underlayment types require different approaches:
Cap Nails vs. Staples:
- Cap nails – Preferred for synthetic underlayment. The plastic cap distributes pressure and prevents tearing. Use 1-inch cap nails driven flush, not overdriven.
- Staples – Acceptable for felt underlayment but not recommended for synthetic products, which can tear at staple points under wind stress
- Self-adhering – No mechanical fasteners needed except at edges in high-wind areas or on slopes steeper than 21:12
Fastening Spacing:
- Fasten every 12-16 inches along the top edge of each course
- Place fasteners 1 inch from the edge to prevent tearing
- Add fasteners every 12-24 inches through the field of the underlayment on steep slopes (over 6:12) or high-wind areas
- Secure all overlaps with fasteners spaced 12-16 inches apart
- At end laps, place fasteners 6 inches from each edge of the overlap
Avoid overdriving fasteners, which can tear the underlayment and create leak points. Fasteners should be flush with the surface, not countersunk.
Special Areas: Valleys, Hips, Ridges, and Dormers
Valleys
Valleys concentrate water flow and require extra protection. Install a valley underlayment layer before applying field underlayment:
- Cut a piece of underlayment at least 36 inches wide (18 inches on each side of the valley center)
- Center it in the valley and fasten along both edges
- For maximum protection, use ice and water shield in valleys regardless of climate
- Apply field underlayment over the valley liner, running courses across the valley
- Trim field underlayment to within 12 inches of the valley center on each side
Never run field underlayment seams down the center of a valley – this creates a primary leak path.
Hips and Ridges
Run underlayment courses over hips, extending at least 6 inches past the hip on both sides. At the ridge, overlap underlayment from both roof planes by at least 6 inches over the peak. On longer roofs or high-wind areas, consider running an additional 18-inch-wide strip along the ridge for added protection.
Dormers
Dormers require careful integration to prevent leaks at the transition points:
- Install underlayment on the main roof up to the base of the dormer
- Install dormer underlayment, starting at the dormer eaves
- Where the dormer sidewall meets the main roof, run main roof underlayment up the sidewall at least 4 inches
- Overlap dormer sidewall underlayment over the main roof underlayment
- Use step flashing at these transitions (installed over underlayment, under shingles)
Window, Skylight, and Pipe Penetration Integration
Penetrations are common leak points. Proper underlayment integration is essential:
Skylight and Window Installation
- Install underlayment up to the bottom edge of the opening
- Install the window or skylight pan flashing
- Run underlayment up the sides of the opening, overlapping the pan flashing
- Install head flashing at the top of the opening
- Run underlayment over the head flashing
This creates a shingle-style overlap where each layer sheds water onto the layer below, preventing water intrusion.
Pipe and Vent Penetrations
For plumbing vents, HVAC vents, and other pipe penetrations:
- Install underlayment up to the penetration
- Cut a hole slightly smaller than the pipe diameter
- Slide underlayment over the pipe
- Cut relief cuts if necessary to lay the underlayment flat
- Seal around the penetration with underlayment tape or sealant
- Overlap the next course over the cuts
- Install pipe flashing boot over underlayment when installing shingles
Some contractors prefer to install pipe boots directly to the deck before underlayment, then integrate underlayment around them. Follow manufacturer guidelines for your specific flashing products.
Ice and Water Shield Placement at Eaves
Building codes in cold climates require ice and water shield at eaves to prevent ice dam damage. Even in moderate climates, self-adhering underlayment at eaves provides superior protection:
- Code requirement – Most codes require ice barrier from the eave edge to a point at least 24 inches inside the exterior wall line
- Best practice – Extend ice and water shield at least 3-6 feet up from the eave, or to a point beyond the expected ice dam formation zone
- Installation – Apply ice and water shield directly to the deck, starting at the eave and working up. Overlap courses by 6 inches.
- Integration – Standard synthetic or felt underlayment overlaps the top edge of the ice and water shield by 3-6 inches
Ice and water shield is also recommended in valleys, around chimneys, at sidewall transitions, and other vulnerable areas regardless of climate.
Working in Different Weather Conditions
Wind
Wind is one of the biggest challenges during underlayment installation. Unsecured underlayment can balloon, tear, or blow off the roof entirely:
- Avoid installation in winds exceeding 15-20 mph
- Fasten each course immediately after rolling it out – never leave large areas unsecured
- Use additional fasteners in windy conditions (every 8-12 inches instead of 12-16)
- Have extra hands available to control material during unrolling
- Weight down the leading edge of unrolled material with boards or sandbags
- Consider switching to self-adhering underlayment in persistently windy locations
Cold Weather
Cold temperatures affect different underlayment types differently:
- Synthetic underlayment – Generally performs well in cold weather down to 20-30°F. Material becomes stiffer but remains workable. Some products have low-temperature installation limits – check manufacturer specs.
- Self-adhering underlayment – Adhesive performance drops significantly below 40-50°F. Many products require special cold-weather application techniques or supplemental mechanical fastening. Some manufacturers offer cold-applied formulations.
- Felt underlayment – Becomes brittle in extreme cold and can crack during handling. Use extra care when unrolling and fastening.
In cold weather, store underlayment materials in a warm location overnight and transport them to the roof just before installation. Warm materials are more pliable and easier to work with.
Heat
Extreme heat presents different challenges: